1.0 Installation and introduction

1.1 Welcome to the TFA.me portal

Please read through the following introduction carefully and follow the instructions step by step.
You can commission all devices and be informed about the basic functions of the TFA.me portal here.

If you have already successfully commissioned your gateway or station and connected it to your WLAN network, you can skip this part of the introduction.

If you are already familiar with the TFA.me portal, you can skip the entire introduction.

1.2 Commissioning the gateway / station and integrating it into your local network

Step 1 - Commissioning:
When commissioning, you must first connect a base unit (TFA.me Gateway or TFA.me weather station) to the Internet via your local WLAN network. Please have your network password ready. You then also need to configure your location.
First connect the mains adapter (included in the scope of delivery) to your base unit.
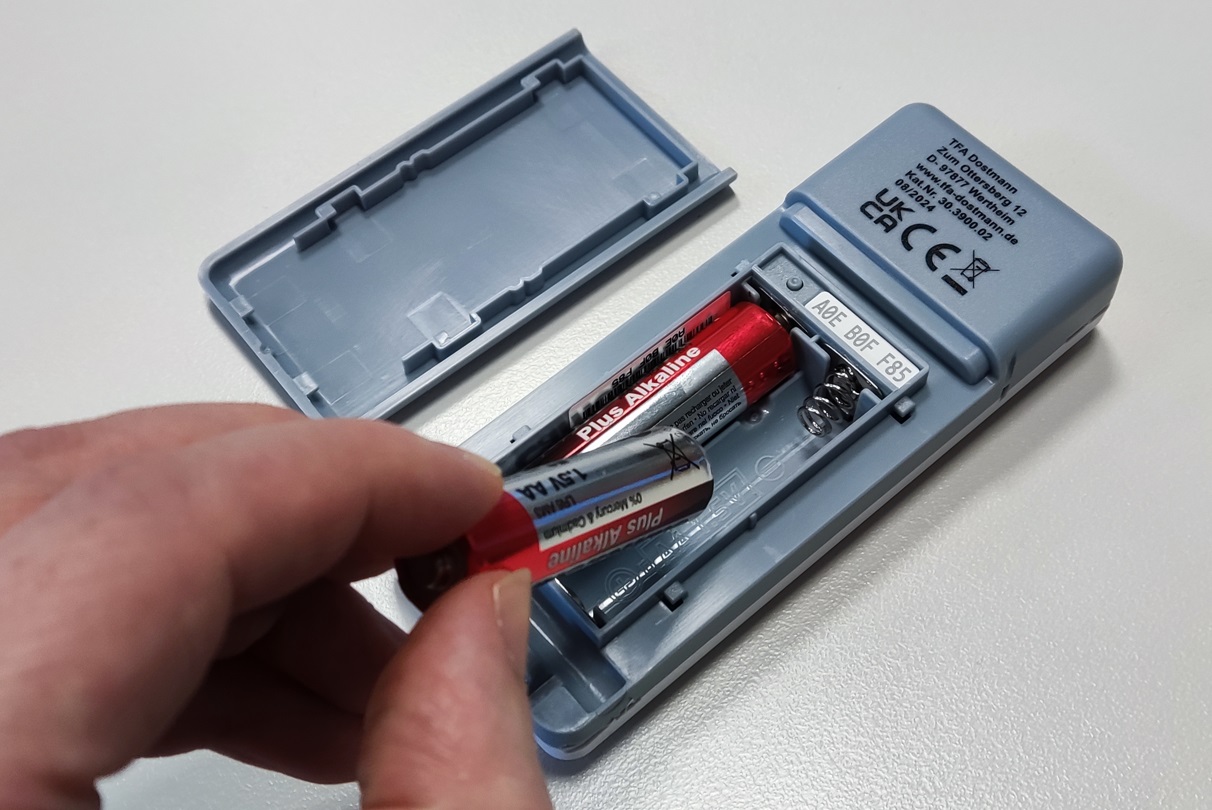
Open the battery compartment of the base unit and insert three new batteries (1.5V AA or AAA depending on the model) with the correct polarity. Note: The batteries act as backup batteries in the event of a power failure/change of location and maintain the display.
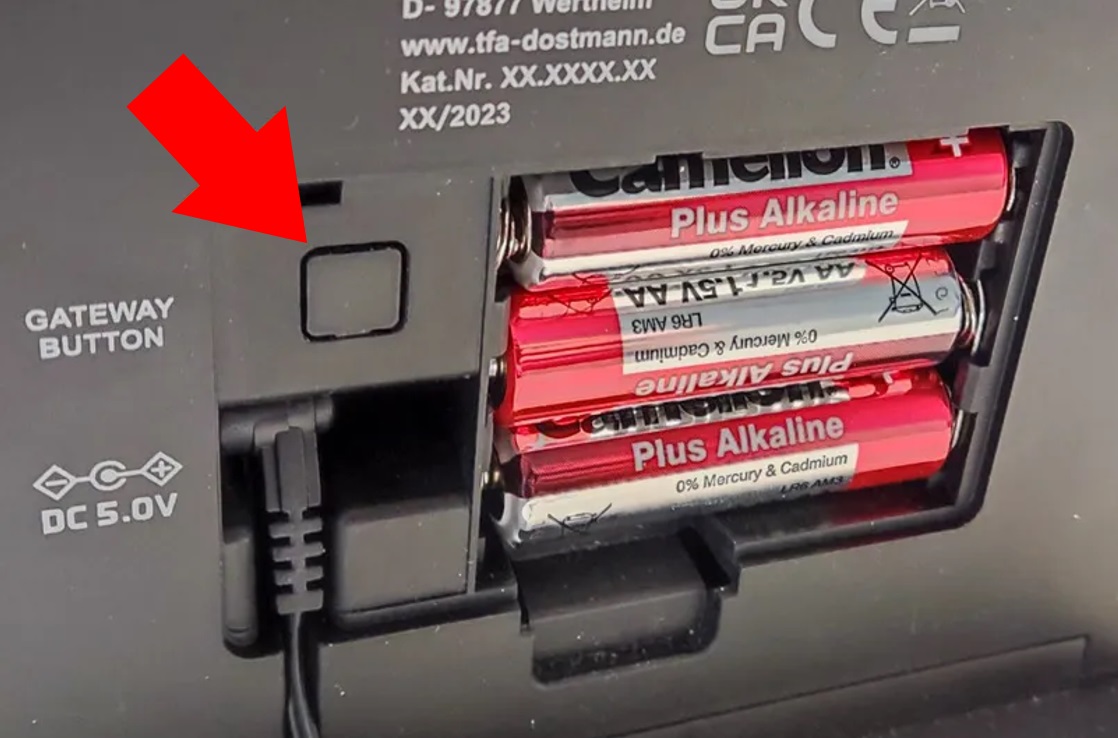
Now press and hold the GATEWAY button on the base unit for three seconds. The device then switches to access point mode.
Note: The GATEWAY button is usually located on the back, inside the battery compartment.

Fig. Station back cover

Step 2 - Establish connection via smartphone/tablet:
Please deactivate your Internet connection via mobile data/network reception during installation.
Then open the Wi-Fi settings on your smartphone/tablet and connect to the TFA.me base unit. You can recognise this by the name of the network and the station ID "TFA-ME-ID-XXX-XXX-XXX". XXX XXX XXX corresponds to the individual ID code of your station (you can also find this ID code on a sticker on the back/bottom of your station).
Note: The smartphone/tablet often reports shortly after connection that there is no Internet connection via this device. This is initially unimportant and can be ignored.

Step 2 - Establish connection with your PC:
Open your network administration and connect to the station via WLAN. You can recognise this by the name of the network and the station ID "TFA-ME-ID-XXX-XXX-XXX". XXX XXX XXX corresponds to the individual ID code of your station (you can also find this ID code on a sticker on the back/bottom of your station).
Note: Refresh the list of available networks if your station's WLAN is not displayed.

Step 3 - Assign WLAN network and submit password
Once you have connected to the station directly via the network settings, please open the "me.local" page on the same device (smartphone, tablet or computer) using any Internet browser. A page like the one shown in the screenshot below will open.
Note: As an alternative to "me.local", you can also enter the IP address "192.168.8.1" in the browser.

Fig. AP page

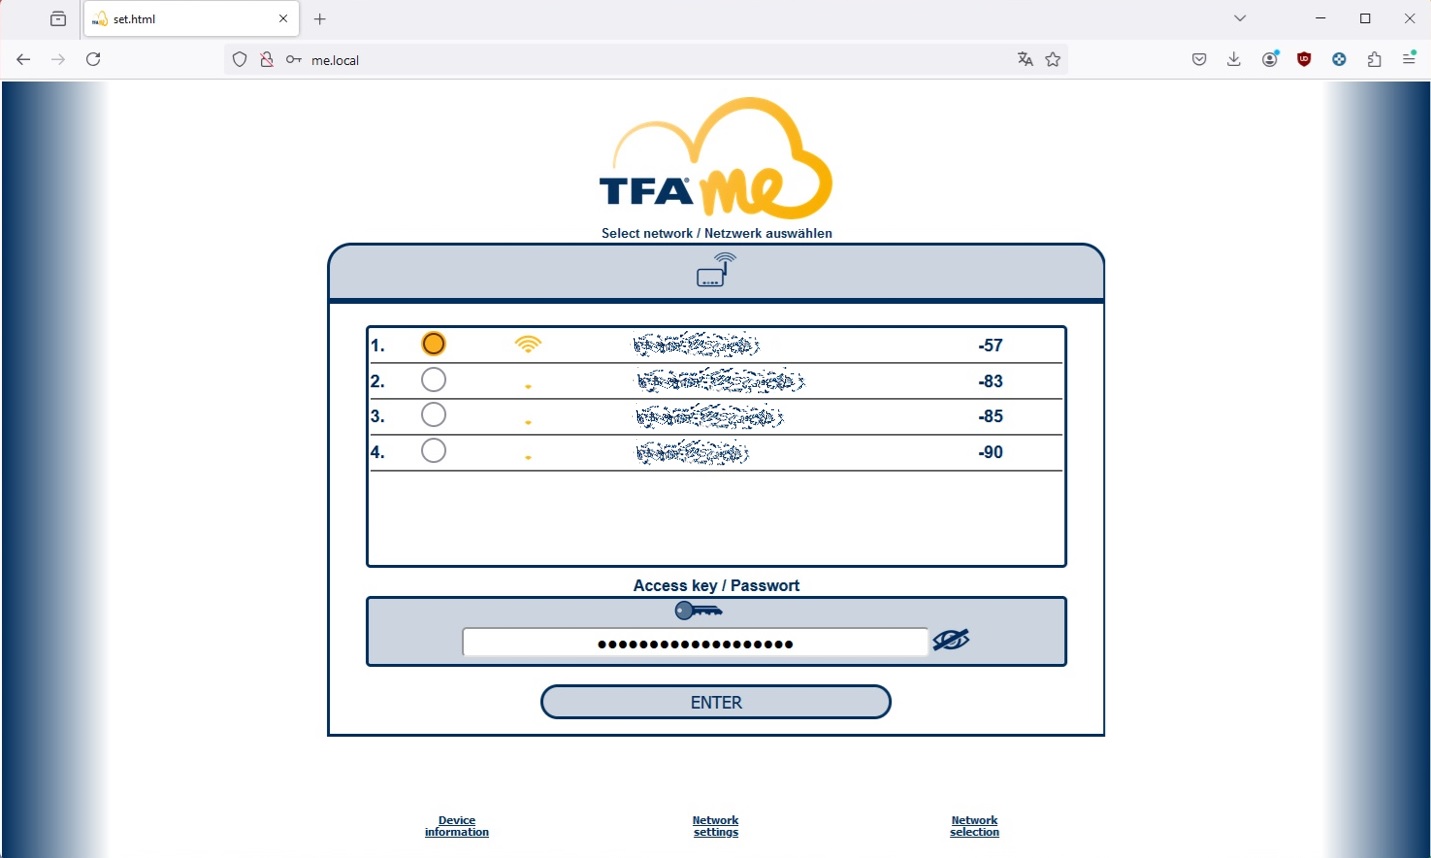
Now select your network (WLAN) here, enter the corresponding password and then confirm your entry with ENTER. When the network setting has been successfully transmitted, a short signal tone sounds on the station. The WLAN symbol is displayed statically when the connection has been established.

IMPORTANT! Your WLAN router must support the 2.4 GHz radio standard.
For multi-band routers that support 2.4 and 5 GHz, the 2.4 GHz network must be switched on.

Step 4 - Set location
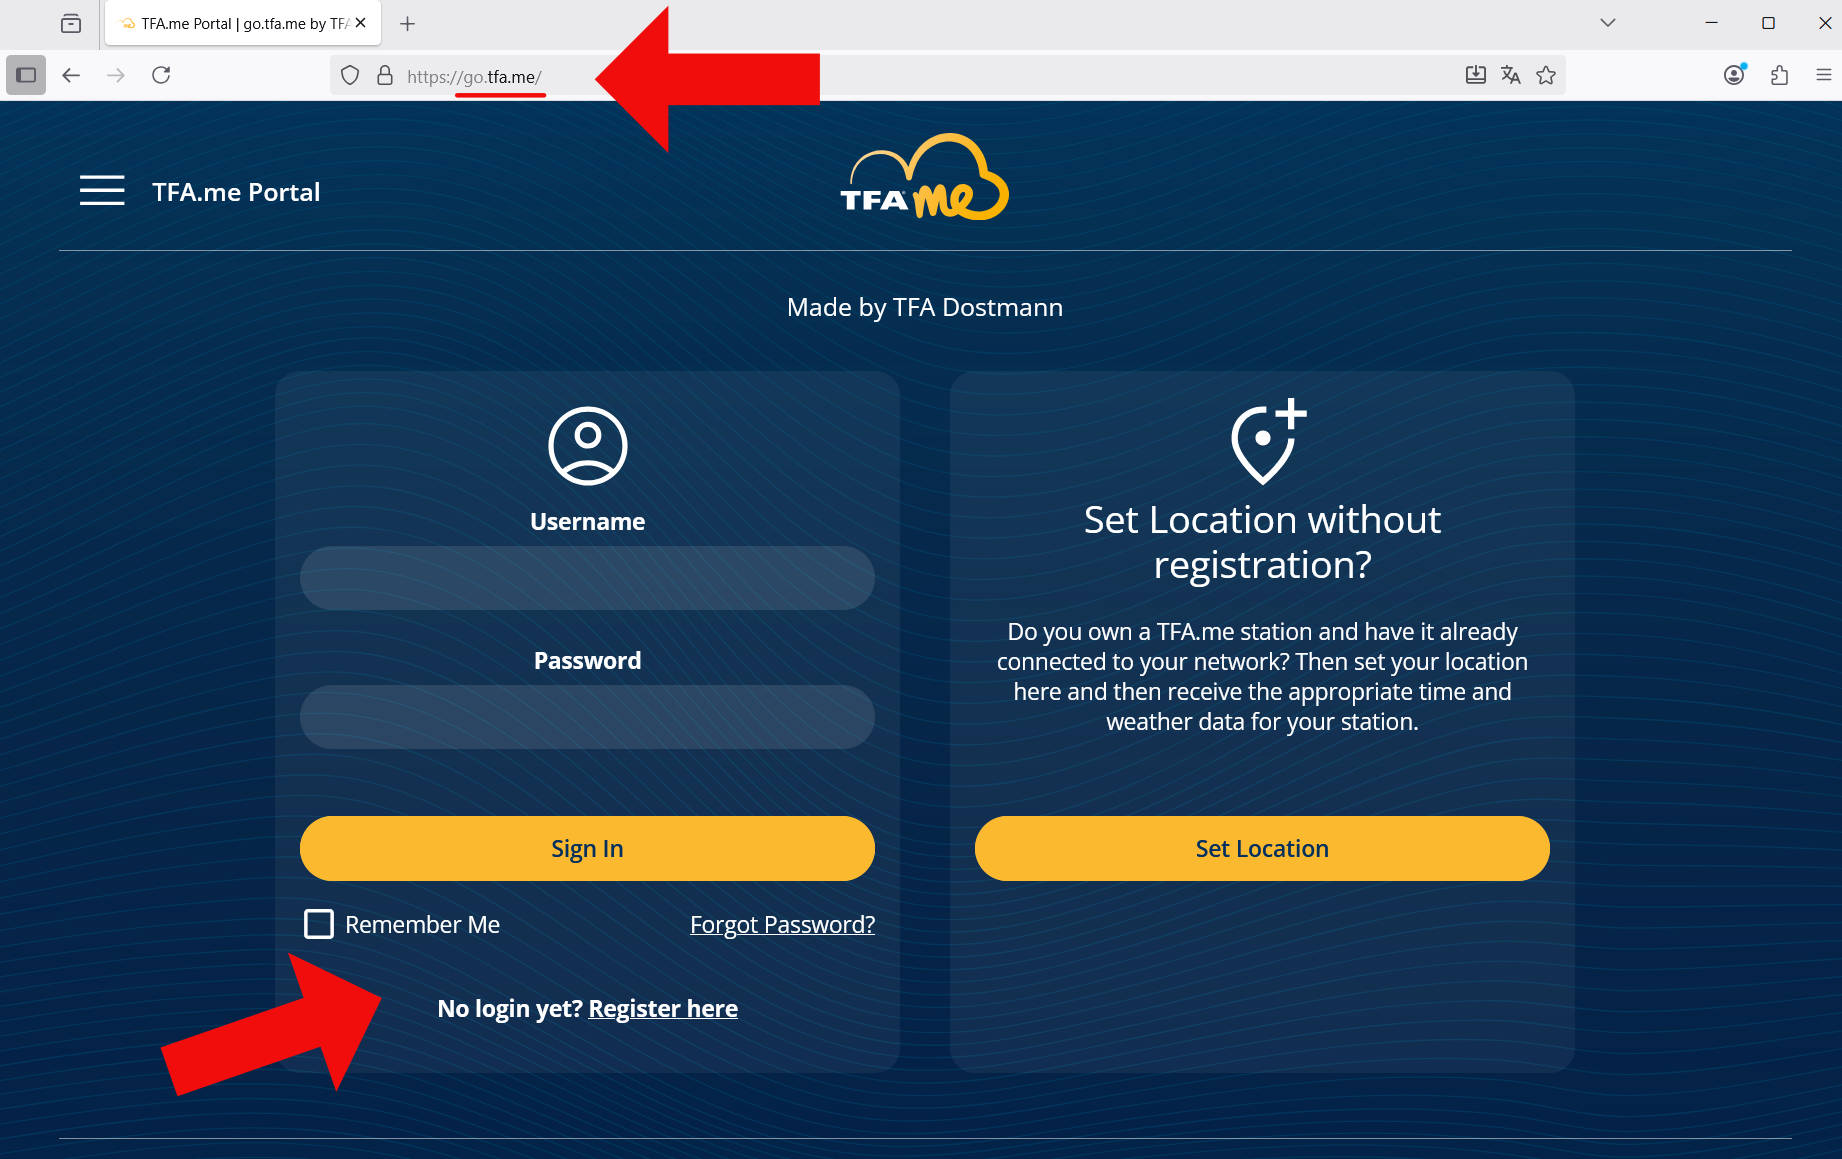
Once the network settings have been transferred, your smartphone, tablet or computer should automatically reconnect to your local Wi-Fi and the Internet. Now open the " go.tfa.me" page using any Internet browser.

Fig. go.TFA.me landing page with highlight on location

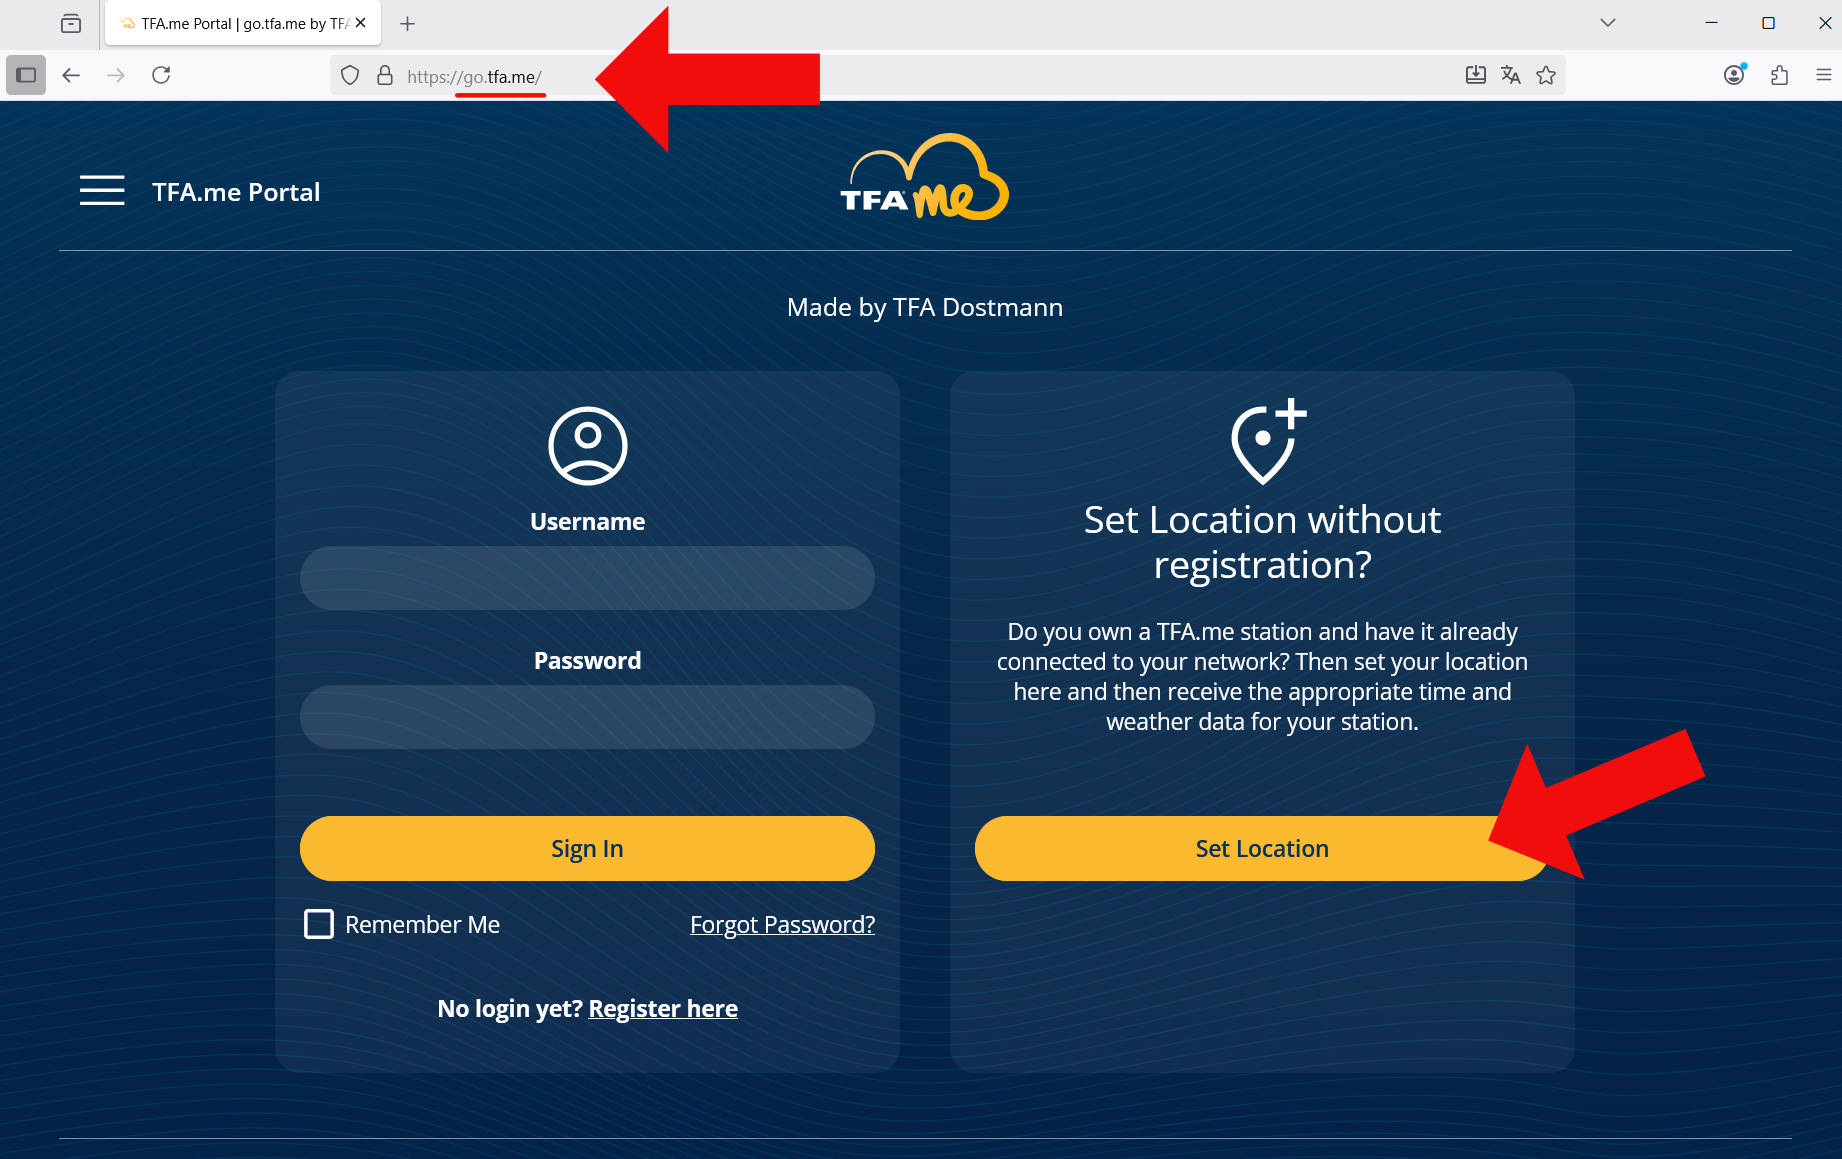
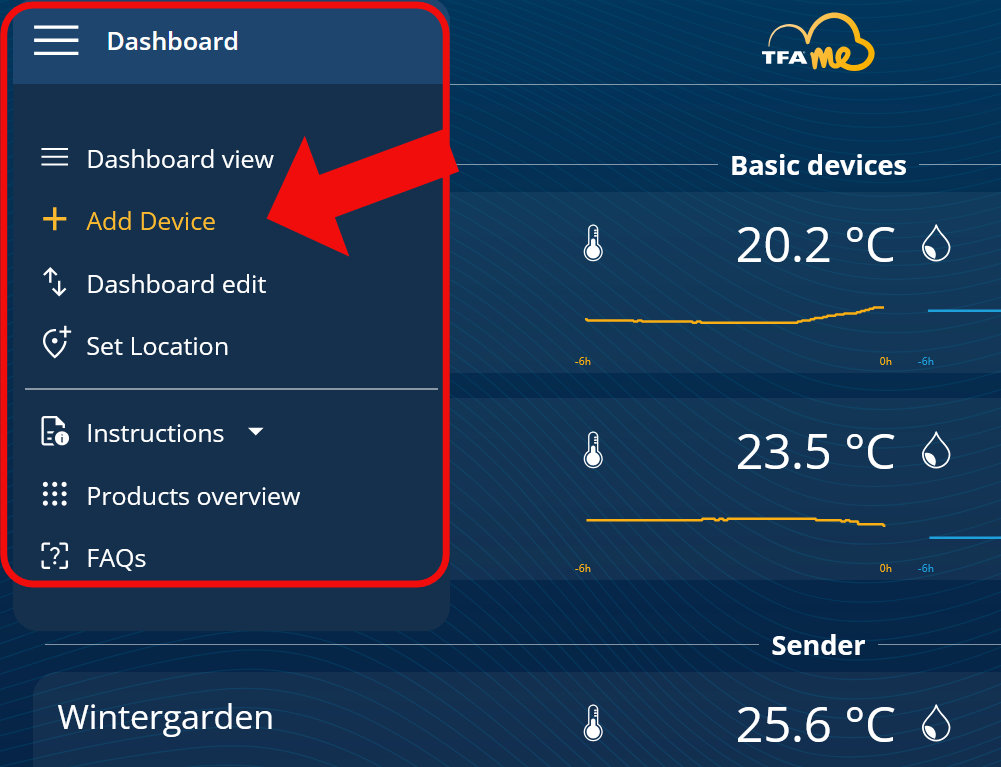
Select "Set location" and follow the instructions to set the location of your device. Your device will then receive the correct local time. In addition to the time, TFA.me weather stations also receive the appropriate weather forecast for the set location.

1.3 Commissioning the transmitter

If the channel can and should also be shown on the display of your base unit, you should first select the desired channel on the base unit using the CH/Channel button and then press and hold the CH/Channel button for 3 seconds (until a beep sounds and the reception symbol for OUT flashes on the base unit display).
Now open the transmitter battery compartment and insert the appropriate batteries (recommended: alkaline batteries) with the correct polarity.

For transmitters with an external cable sensor, please plug the cable sensor into the slot in the battery compartment.

Fig. Batteries in transmitter

Close the battery compartment again.
If you would also like to use the transmitter with the TFA.me portal, keep the transmitter(s) to hand for the time being.

1.4 Login / Register

If you only want to receive time and weather data from your TFA.me weather station and do not wish to use your local measured values online via the TFA.me portal, you have already completed the commissioning process now.

If you would like to use the local measured values from your devices (gateway/station/transmitter) online with the TFA.me portal, you need to create an account.

Registration and use of the TFA.me portal is free of charge.

Fig. go.TFA.me landing page with highlight on Login/Register

1.5 Adding a device (gateway / station / transmitter) to the TFA.me portal

Logged-in users will find the "Add device" option at the top left of the navigation menu.

Fig. Navigation menu

When you open the "Add device" page, you can enter the 9-digit ID number of a compatible TFA.me device (gateway/station/transmitter).
The 9-digit ID number can usually be found on a sticker on the back of the device (in the battery compartment in the case of transmitters).
You must also assign a name to the device.
Optionally (if desired), you can also create a group/category and assign new devices to a specific group/category.

If the device has been added successfully, it will always be displayed directly in the overview from now on.
You can now place the device in your desired location.

1.6 Functions on the "Overview" page

1 - Navigation menu
2 - TFA.me logo (back to home page/overview)
3 - Account menu
4 - Separator for groups/categories
5 - List of integrated devices with current measured values and history of the last 6 hours.

Fig. Screenshot with bullet points

1.7 Functions on the device details page

1 - Name/designation of the device
2 - Save settings or return to previous settings
3 - Export options
4 - Select time range
5 - Current measured values and max. min. values
6 - Diagram display
7 - Diagram full screen, customise diagram display area, transparency off/on

Fig. Screenshot with bullet points

Exit or instructions Read more

This concludes the introduction to commissioning with information on the basic functions.

You can call up the introduction and the full instructions for use again at any time via the "Instructions" menu item.